Many of you want to sync outlook mail with Gmail webmail client but don’t know how to do the setup for that. Today, in this technical guide we’ll discuss the manual technique that is necessary to setup Outlook for Gmail. Apart from this, we’ll help you to describe this question with the help of the pictures so that it is easy to understand the steps clearly.
Before starting the setup processes let’s know why users use Gmail for their Outlook Address:
Why Users setup Outlook for their Gmail Account?
Gmail is one of the most popular webmail platforms that has many rich features. Due to this, one wants to handle their Gmail emails & account form a client email software such as Outlook or any other email client because they don’t want to manage their emails from the different Webmail clients. Hence, they need to set up their Outlook Account for Gmail.
Now, let’s move forward to know the manual steps.
Manual Steps to Setup Outlook for Gmail
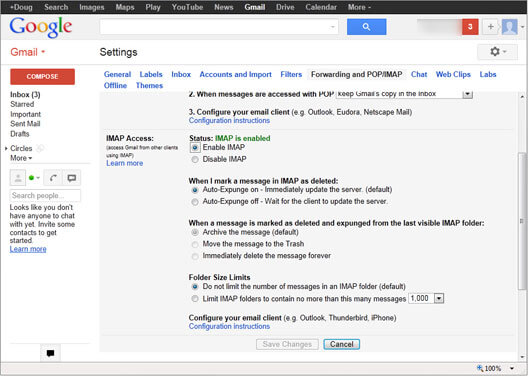
To work with Gmail through the Outlook one need to set up their email client according to Gmail i.e., sync outlook mail with Gmail. To use this functionality, one must have to enable the IMAP account for your Gmail Emails. To Enable the IMAP protocol, follow the below steps:
- Log in to Gmail Account.
- Click on the settings button looks like a gear icon.
- Hit on the Forwarding and POP/IMAP to set up the POP and IMAP settings.
- Now click on the Enable IMAP button checker.
- Finally, click on the Save button.
After performing the above steps, one can completely configure the Gmail account for IMAP. After that, you can add your Gmail account to outlook.
Now follow the steps and procedures to follow:
- Open your Outlook Account.
- Here, click on the file and then on the Account Settings.
- Click on New button on the Account Settings dialogue box.
- Select the Email Account that you want to set up and then click on the Next.
- Here, select the additional server types or the manual setup.
- Select the POP/IMAP account then on the Next button.
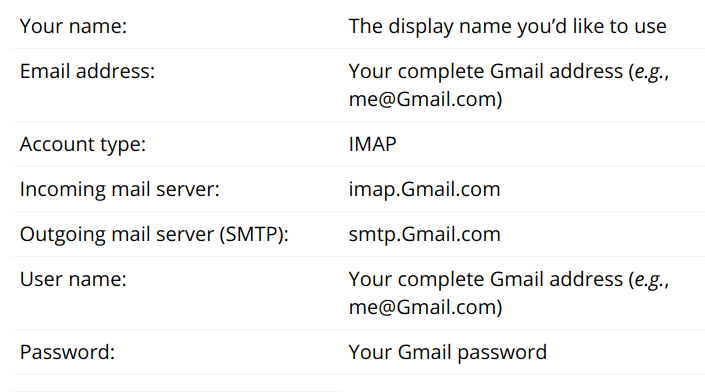
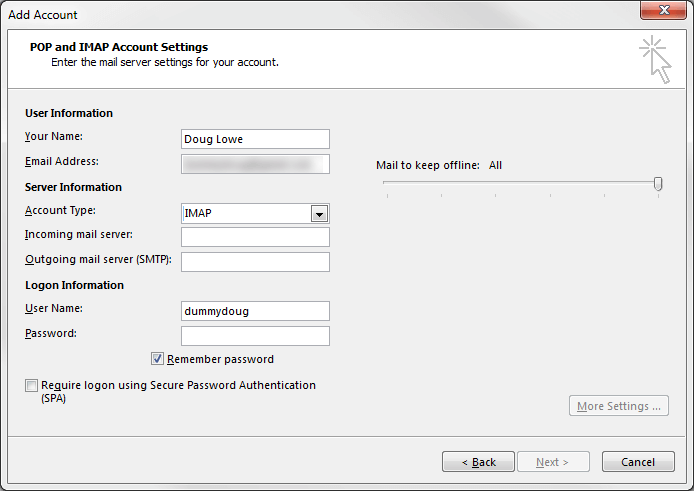
- This will open the Add Account then enter the following information:
- Then click on the More Settings.
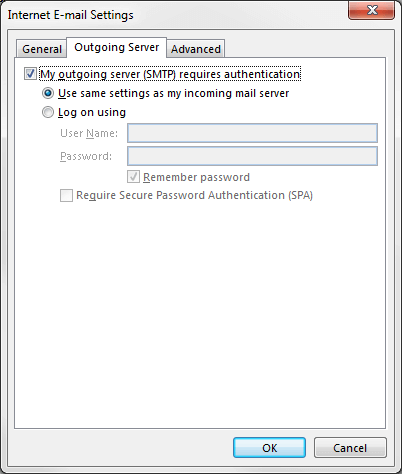
- Press the Outgoing Server tab.
- Tick mark the option “My outgoing server (SMTP) requires authentication”.
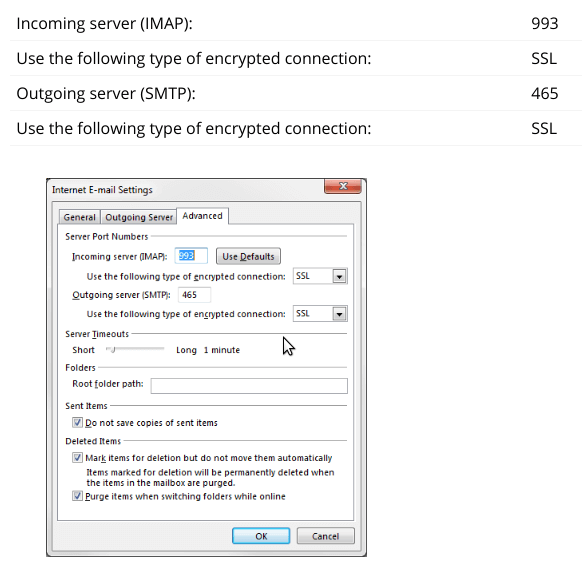
- Then, click on the Advanced Tab.
- After that, enter the following information:
- Press the Ok button>>Next.
- Next, Outlook starts its Connection testing for setting up the Outlook.
- After the process completes, click on Close and then on the Finish button.
After finishing these steps, your Outlook is set up for your Gmail account. With the help of manual methods, the process of setting up an account sometimes corrupts your data. So, keep reading to know what to do before corruption occurs.
What if Corruption Occur When Setup Outlook for Gmail?
Users face this problem normally at the time when they set up their Microsoft Outlook PST files for Gmail. So, it’s better to use the Outlook PST Repair Tool to repair all your emails in just no time. Otherwise, one can also take the backup of their emails previously before starting the setup process so that they can again initiate the setup process with the uncorrupted Outlook PST files.
Final Words
In this technical guide, we have discussed all the methods and technique that is necessary to setup Outlook for Gmail. Also, we’ll get to know why a user wants to sync Outlook mail with Gmail and the ways to deal with the situation when there is a corruption of Outlook data. Follow these quality steps carefully and in the end, you’ll find that your Outlook account is perfectly set up for the Gmail Account.