Summary: The need for email management is a must in today’s world. Thus, many email clients take care of their services such as Outlook. Outlook permits the user to share emails, and also directly sync their email into their calendar and contact list. Still, it also has some loopholes and thus it also faces several issues.One of them is Error 0x80042109 that disables the users to send their emails. If you are also struggling with the same issue then follow this guide carefully. So here you will learn how to fix Outlook Error 0x80042109
0x80042109 Outlook 2010 Error
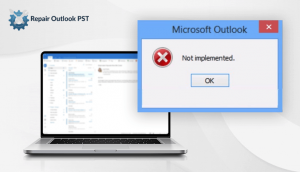
The Error Code 0x80042109 usually occurs during sending emails through Microsoft Outlook. As a result, their outgoing emails are unable to reach the recipient. And, they can view an error message about the issue on the email server on the screen. Although, this issue doesn’t affect other system processes. This means it doesn’t cause the system to freeze, slowdowns, or crashes. It only affects Outlook. The following error messages state:
“Sending and Receiving reported error (0x80042109): Outlook is unable to connect to your outgoing (SMTP) e-mail server.”
“Sending reported error (0x80042109): Outlook cannot connect to your outgoing (SMTP) e-mail server.”
If you get the first error message, it indicates that there is an issue with the Internet connectivity that prevents users from delivering the emails. If you get the second message stating that Outlook is not responsive and it won’t let you execute any action.
Some Handy Procedures use to fix Outlook Error 0x80042109
Method 1: Altering the Outgoing Port
The value of a standard outgoing SMTP (Simple Mail Transfer Protocol) port is automatically set to 25. It is seen that Internet service providers block this port value. Which automatically disables the user to receive and send emails. In this case, you can select from two solutions:
- Changing the SMTP value to 26
- Switching to TLS port, then choosing 587
The second option indicates setting a non-conventional port value. It is a tested approach to this issue. So, we suggest the following instructions:
- First start Outlook, then tap Tools.
- Then, approach Account Settings, then double-tap the email address.
- Choose More Settings, tap Advanced.
- Alter the Outgoing server SMTP port to 587, then select TLS encryption.
- Verify the alterations you’ve made.
- Once the outgoing port modifies, inspect if the user sends emails without the error message.
Method 2: Turn off the Third-Party Antivirus
Besides turning off the proxy server, this will also deactivate the third-party antivirus. As there is a possibility that the security app is interfering with Outlook’s operations. So, if this is the scenario then, temporarily turn off the antivirus. Once the Outlook Error 0x80042109 Windows 7, is gone then, uninstall the security app.
Method 3: Install the Pending Updates
The advantage of Windows 10 is that it keeps the regular updates. That helps the users to repair the problems by developing patches. Therefore, users should install any pending updates to avoid Error 0x80042109. Generally, the system downloads these updates by default in the background. But you can also initiate the process to avoid the error by following steps::
- Visit the taskbar, then right-tap the Windows icon.
- Now, choose Settings from the menu.
- Select the Update & Security.
- Visit the right pane and tap Check for Updates on the next page.
- Let Windows Update inspect for the existing updates.
- If there are updates then, download them. When the process is done, restart the computer to install the updates.
- Once the update installs, try the Outlook again to see if the error exists or not. If it persists, then try the next approach.
Method 4: Turn off the Proxy Server
If the user faces an issue while connecting with the email server then, turn off the proxy server temporarily. This may be interfering with the connection that later results in the Error code 0x80042109 to appear. To perform this process you have to follow these instructions:
- First, press Windows Key+S on the keyboard to start the Search box.
- Then, type “CMD” (no quotes) inside the Search box.
- Now, start an elevated form of Command Prompt. Press Ctrl+Shift+Enter on your keyboard, instead of tapping OK.
- When the Command Prompt is up, operate the following command: netsh winhttp reset proxy.
This command line will eliminate the proxy server, configuring the system for the direct approach to the Internet.
Method 5: Use the Command Prompt to avoid Junk Files
- First, tap the Search icon on the taskbar, then type “Command Prompt” (no quotes).
- Right-tap the Command Prompt from the results, and choose Run as Administrator.
- If prompted to give permission to the app, tap Yes.
- Type “cleanmgr” (no quotes), inside Command Prompt, tap Enter.
- The system will initiate the searching for and deleting junk files.
When the cleanup process finished, try sending emails through Outlook again to see if the issue has been resolved.
Method 6: Inspect the Internet Connectivity
Sometimes, your email fails to send due to slow Internet connection. To check if this is the situation then, we recommend the user to perform the following troubleshooting steps:
- First, restart the router and modem.
- Then, use a wired Internet connection instead of a WiFi connection.
- Finally, restart the computer.
Once you have a stable connection then, try sending emails through Outlook.
Method 7: Eliminate then Adding the Account
- First, press Windows Key+I to start the Settings app on your keyboard.
- When the Settings app opens, choose Apps.
- Scroll down through the apps until you locate Outlook.
- Now, choose Outlook, then tap Advanced Options.
- Then, on the next page, tap Reset.
- Once resetting the Outlook account, attach the information again.
- Lastly, Configure the Outlook account, and wait till the synchronization process is completed.
Once you set up the Outlook account, send the emails again to see if the error still exists or not.
Method 8: Operate the System Restore
You can bring back your system to the date, where this issue did not exist. You can operate the system restore to avoid the Error 0x80042109. To perform this process accompany these instructions that are given below:
- First, tap the Search icon on the taskbar.
- Then, type “System Restore” (no quotes), then choose to Create a Restore Point from the results.
- Tap System Restore, then on the new window, tap Next.
- Ensure to choose the Show More Restore Points option.
- Choose a restore point that time returns to the time when the problem doesn’t exist.
- Tap Next to initiate the process.
Once operating a system restore, restart the computer and try to use Outlook again
These were some of the manual approaches that users can try to fix this error. If the user cannot fix this error. Then it means they first, have to repair their corrupt or damaged PST files. Then, they can opt for an alternative tool. Users can use PST Recovery that will reinstall the Outlook email items such as Emails, Calendars, Contacts, and Distribution groups, etc. This utility is compatible with the PST Files generated by MS Outlook 2016, 2013, 2010, 2007, 2003, 2002, etc
Wrap up
This article consists of different methods that can easily fix Outlook Error 0x80042109. Users can use either of the following methods if this is unable to fix. Then first, fix the corrupted or damaged PST files by using an alternative tool.


